The first card of the new year is a fact! I created a fun Winter CAS Card for the new Cas on Friday Challenge! I created for this amazing challenge blog before and so happy to announce I will be starting another term there! I hope you will all share your CAS winter themed inspiration with us there!
I started this card with a soft blue card base in A2 size. I then added a fun front panel, which is diecutted with the largest Wonky Stitched Rectangle Die from MFT Stamps. I starting stamping the fun images from the Warm Hugs stamp set from Heffy Doodle, and masked them with masking paper. This way you can place images in front of the other and off course, keep your images clean so you can start blending!
I blended a small piece of my background using Ranger Distress Oxide ink and then removed the masking paper from my card. All clean images to then colour with Copic Markers. I added some splatters and stars to finish my winter card with!
Thank you so much for watching today, hope to see you next time!
Hi there crafters! Sharing a super festive and adorable card with you today! I created this cute card with the amazing Mice Day to Celebrate stamp set from My Favorite Things!
I started this card with a white card base in A2 size. I then added a front panel, just because I so love stitched borders, lol, diecutted from white cardstock with the largest die from the A2 Wonky Stitched Rectangles Die-namics. I wanted to create a one layer card, so I started with stamping all the cute images I wanted to be up front. I then masked these images and started stamping the images I wanted to fall behind the first stamped images. I then masked these images as well.
After masking I blended the bottom in a brown colour and then the upper part with two blue colours, using the Brick Wall Stencil. I then removed the masking paper and coloured all the cute images with Copic Markers.
Thank you so much for watching today, hope to see you next time!
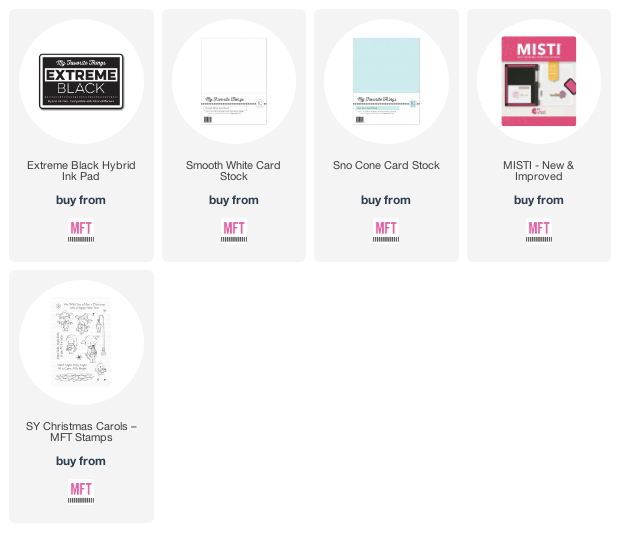
Hi everyone! Today I'm sharing a cute card created with the super adorable stamp set Christmas Carols from My Favorite Things! This set is just the cutest Christmas stamp set ever!
I started this card with a card base in A2 size created from Sno Cone Cardstock. I then added a front panel, which I diecutted from white cardstock with a die from the A2 Stitched Rectangle Stax Die-namics.
I then stamped the cute images from the stamp set on to my front panel and masked these with masking paper. I kept this card a one layer card, so I masked the images to keep them clean before started blending. I blended my background in soft pink and blue and added some blue splatters. I then removed the masking paper and coloured the images with Copic Markers. I added the fun sentiment from the set at the top of my card to finish with!
Thank you so much for watching today, hope to see you next time!
Hoi allemaal, welkom vandaag op mijn blog! Ik deel vandaag graag een prachtige kaart gemaakt met de stempelset Enchanted Iris met jullie! Deze stempelset is echt prachtig, de bloemen zijn zo mooi! Ik zou het zeker niet erg vinden om deze in huis te hebben! Aan het einde van deze post vind je een Video Tutorial waarin je kunt zien hoe deze kaart gemaakt is!
Hi guys, welcome to my blog today! I'm sharing a gorgeous card today created with the Enchanted Iris stamp set from Altenew! I love this flower set, these flowers are so pretty! Wouldn't mind having a few of them in my home! Make sure you watch the Video Tutorial at the end of this post to see how this card is created!
De basis voor deze kaart is een strook Thick Whisper White Cardstock van Stampin' Up. Op de voorgrond heb ik een frame van Whisper White Cardstock geplaatst op dimensionals die ik gestanst heb met 2 Stitched Rectangle Dies van MFT. Op de basis van de kaart heb ik binnen de lijnen van het frame een deel gekleurd met een blending tool en Peacock Feathers Distress inkt van Ranger.
. The base for this card is from Thick Whisper White Cardstock from Stampin' Up. Up front I placed a frame of Whisper White Cardstock on dimensionals that I diecutted with two Stitched Rectangle Dies from MFT. I coloured a piece of paper on my card that fits right behind the frame with a blending tool and Peacock Feather Distress ink from Ranger.
Daarna heb ik mijn bloemen gestempeld met behulp van een stamping tool en Black Tuxedo Memento inkt op Solar White Neenah cardstock. Dit papier is geweldig om met Copic Markers te kleuren. Ik heb de bloemen wel eerst gestanst voor ik met kleuren ben begonnen.
I then stamped my flowers using a stamping tool and Black Tuxedo Memento ink on to Solar White Neenah Cardstock. This paper is great to color with Copic Markers. I diecutted these images with the coordinating dies before colouring.
Ik heb de bloem Iris wel even moeten googlen om te zien welke kleuren deze heeft. Ik ben wel helemaal verliefd op de paarse versie, zo mooi! Ik ben begonnen met de groene tinten op de blaadjes. Daarna heb ik de bloemen in verschillende tinten paars gekleurd met geel in het midden. Op onderstaande foto kun je zien welke kleuren Copic Markers ik heb gebruikt voor deze kaart.
I actually googled the Iris flower to see which colours it usually has. I think this purple version is just amazing! I started with the greens for the leaves and went from light up to darker colours. I coloured my flowers in different shades of purple and kept some yellow in the middle. In my photo below you can see which colours Copic Markers I used to create this card with.
Ook voor deze kaart heb ik weer mijn best gedaan om een Video Tutorial te maken. Het wordt alleen steeds donkerder in huis met deze dagen, dus de kleuren met name op het inkleur gedeelte hadden scherper gekund. Toch hoop ik dat het een goed beeld geeft hoe deze kaart tot stand is gekomen, veel kijkplezier! Om de video in HD te kunnen bekijken op YouTube, klik hier!
I tried my best to create a Video Tutorial for this card as well. But with winter arriving it gets darker inside our house as well, so I was hoping the Video would be a bit better quality than it is, I hope everything is still sharp enough for you to get a good idea about how this card was created, have fun watching! If you'd like to see this video in HD on YouTube, click here!
Ik zend deze kaart graag in naar de nieuwe challenge die gisteren van start is gegaan bij Freshly Made Sketches! Altijd leuk om mee te doen met een leuke sketch! Bedankt voor het kijken, tot de volgende keer!
I'd like to send this card in to the challenge that started yesterday at Freshly Made Sketches! Always fun to enter a challenge with a nice sketch! Thanks for watching, hope to see you next time!
Welkom vandaag bij weer een nieuwe blogpost van Stampin with Liz Design! Gisteren heb ik een leuke tip gedeeld bij Stampin' Up! en vandaag wil ik deze tip natuurlijk ook graag met mijn bloglezers delen. Mijn favoriete techniek is een achtergrond blenden. Ik heb veel vragen van jullie ontvangen over hoe je dit doet en vandaag deel ik graag wat tips met jullie!
Welcome today at a new Stampin with Liz Design blog post! Yesterday I shared a fun technique over at Stampin' Up! and today I'd like to share this tip with you as well on my blog. My favourite technique is blending a background and some of you asked me how to do this, so here some tips!
Ik ben vandaag gegaan voor een kaart voor een kaart met safari look met de schattige diertjes uit de Animal Outing stempelset. Ik heb deze diertjes op Whisper White Cardstock gestempeld met Tuxedo Black Memento ink and gestanst met de bijpassende Animal Friends thinlits. Daarna heb ik ze gekleurd met Stampin' Blend Markers. Je kunt de gebruikte kleuren en items onderaan deze post in een supply list vinden.
I went for a safari look for my card using the fun animals from the Animal Outing Stamp set. I stamped these cuties on Whisper White Cardstock with Tuxedo Black Memento ink and then diecutted them with the coordinating Animal Friends Thinlits. I coloured them with the Stampin' Blends Markers. You can check all the colours and items used for this card at the and of my post in a Supply List.
Ik heb voor de basis van deze kaart een strook Whisper White cardstock genomen. Voor de bodem ook. Beide delen heb ik gesponst met een Stamping Sponge en inkt. Voor de lucht heb ik Daffodil Delight en Pumpkin Pie inkt gebruikt. Voor de bodem Crumb Cake inkt. Om te bgeinnen met sponsen, dip je de spons op je inktpad. Ik knip mijn spons in vier stukjes en beïnkt de ronde kant. Begin met sponsen op een stuk papier dat je niet gaat gebruiken. Veeg met draaiende bewegingen over je papier. De tip is wel om de eerste inkt op een stuk extra papier kwijt te raken, zoals je kunt zien op de foto hierboven aan de linkerkant van mijn papier is de eerste inkt te hard, te rijk op het papier. Breng meerdere lagen aan totdat je tevreden bent met het resultaat. Een beetje oefening is nodig, maar wanneer je de techniek door hebt, is het eigenlijk heel makkelijk en een leuke techniek! Om wat meer structuur aan te brengen, kun je nog kiezen om spatters aan te brengen, dit kan zowel in dezelfde kleur of een andere kleur inkt of door wat waterdruppels op je papier te laten vallen. Voor de bodem heb ik beide gedaan.
For the base of my card I used a piece of Whisper White Cardstock. I used a different piece of this paper for the bottom of my card. I sponged both pieces with ink and a Stamping Sponge For the sky I used Daffodil Delight and Pumpkin Pie inks. For the bottom I used Crumb Cake ink. To create this effect, simply dip your sponge in your ink pad. (I cut my sponges in four pieces and inked the round part.) Begin sponging in an area that will not be used for your card and start applying ink in round movements. Important note: The trick for a nicely blended result is first to dab some ink OFF your sponge. As you can see in the photo on the left, the area where I first applied Pumpkin Pie ink looks too harsh because I started with too much ink. To get a great, even result, apply more then one layer untill you are satisfied with the end result! It takes a bit of practise, but when you get the hang of this technique, it is a lot of fun and actually very easy to do! To give a bit more texture to your sponged paper, you can spatter some ink in the same or a different color . . . or let some waterdrops fall on your paper. I applied both tips on the “sand” part of my card.
Neem het deel wat het mooist gesponst is en trim deze op maat voor je kaart. Ik houd zelf erg van de stitched look en heb mijn kaart een stitched randje gegeven met een framelit uit de Stitched Labels Framelits. De bodem heb ik gemaakt met een framelit die je vind in de Swirly Scribbles Thinlits. De tekst is bovenaan mijn kaart gestempeld met Tuxedo Black Memento inkt. De giraf en het nijlpaard zijn achter het papier geplaatst voor de bodem, de kangaroo en de tak met kikker zijn met dimensionals op de kaart aangebracht.
Take the best part of your sponged pieces of paper and trim it to the size of your card. I love the stitched look and gave my card a stitch on the edges with the stitched die from the Stitched Labels Framelits. I created the bottom by die cutting two pieces of sponged paper with the die you’ll find in the Swirly Scribbles Thinlits. I stamped the sentiment in Tuxedo Black Memento Ink at the top of my card. I placed the giraffe and rhino behind my paper. The kangaroo and branch with the frog are adhered on the card using Stampin’ Dimensionals.




.jpg)


