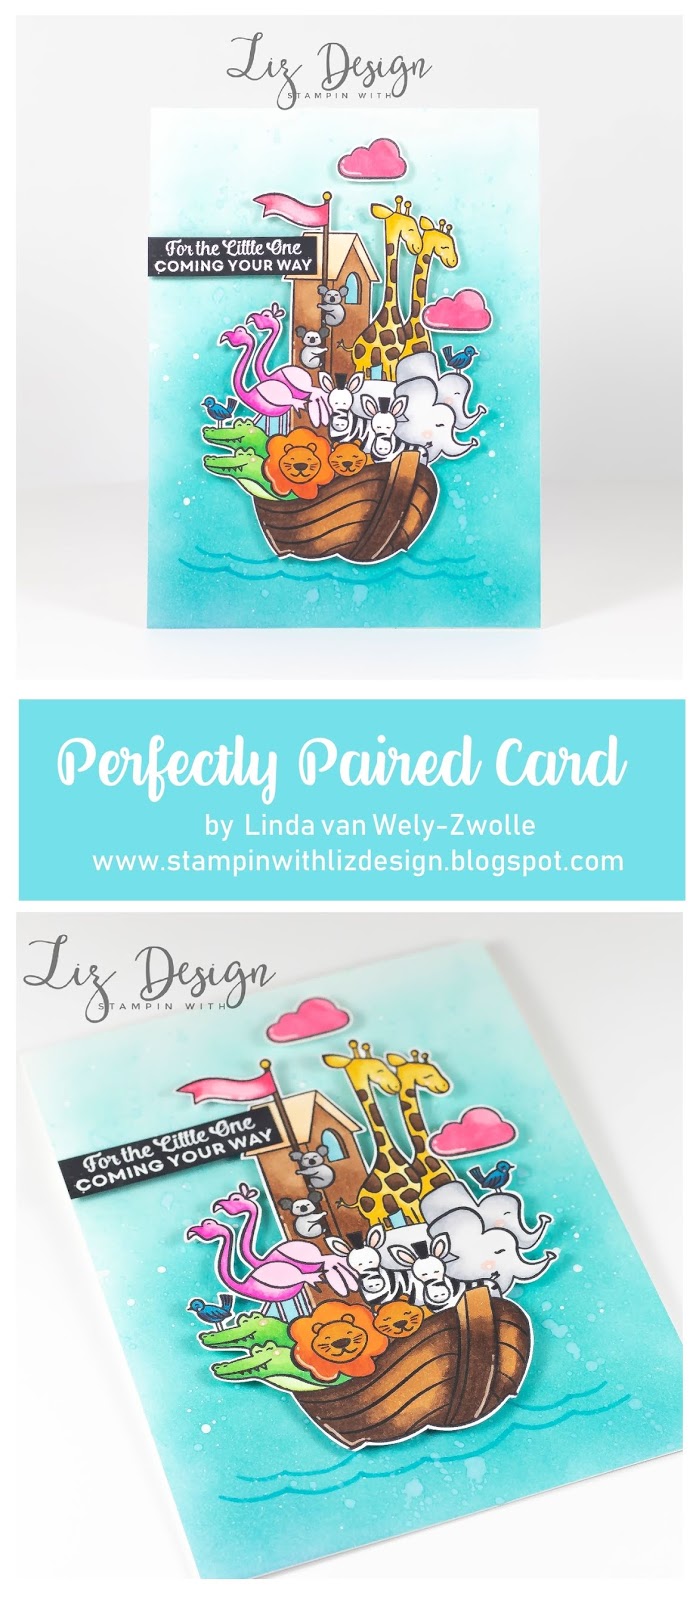
Welcome to my last blog post for 2018! I had an amazing creative year and can only hope 2019 will be even better! Wishing you all the hapiness for next year! Showiug you today this fun card created with a stamp set from Stampin' Up that will be available in the new catalog that will launce this week, the Perfectly Paired stamp set!
For this card I used a base from Thick Whisper White Cardstock that I blended with a blending tool and Peacock Feathers Distress ink from Ranger. I added some ink spatters with the same color ink and some white spatters.
I coloured the stamped image of the boat with the cute animals with Copic Markers. I stamped the image with Black Tuxedo Memento ink on Whisper White cardstock. After colouring I fussy cutted the image so I could place it on my card with dimensionals. I stamped the text with Versamark ink on Black cardstock and used white embossingpowder.
Thank you so much for watching today, hope to see you next time!
Hi everyone! Hope you all had an amazing Christmas! I love to spend these days with my family, but most admit, I loved getting back in to my craft room too! So today I'm sharing this fun winter card! This card was created with the fun stamp set Winter is Here from The Greeting Farm, Simon Says Stamps.
I started this card by diecutting a piece of white cardstock with a Wonky Stitched Rectangle Die from My Favourite Things. I then stamped these cute children on the front with Black Tuxedo Memento Ink. I also stamped them on a piece of masking tape and fussy cutted these to cover my image before blending my background.
I also covered the bottom with a piece of masked tape that I diecutted with an Ocean Waves die from MFT. I covered the sides with masking tape as well, that I ripped on the sides to create a wrinkled look. I then blended my background with a blending tool and 3 colors of Distress ink from Ranger, Wilted Violet, Mermaid Lagoon and Faded Jeans. Remove the masking tape afterwards.
I then started colouring my stamped images of the children. Check the photo below to see what colours of Copic Markers I used. I started colouring with the darkest colours first and then worked my way up to the lightest color.
If you'd like to see how this card came about, then watch the Video Tutorial below or on YouTube in HD here! I try to post a few video's a week if life letst me, let me know if you'd liked this one by leaving a thumbs up!
Thank you so much for watching today, hope to see you next time!
Hi, welcome to a new blog post! Almost Christmas, I have all my Christmas grosseries in, so had some time to create this morning. I created this fun birthday card with the Saddle Up & Celebrate stamp set from MFT!
A little cowgirl, I just love this image! I own a Paint Horse in The Netherlands and ride Western Pleausure, Horsemanship etc with her. I don't compete anymore, but I looked like this a few times when I still competed a few years back, lol. Just with pense and a horse, haha. I stamped these fun images with Black Tuxedo Memento ink and diecutted them with the coordinating dies.
I created a background by blending the background. I used masks, I created one for the bottom with the Grassy Edges Dies and used the Mini Cloud Edges Stencil for the sky. You can't see the sky part on the photo very well, but there are some clouds there! I coloured my images with Copic Markers.
I diecutted my backgroud with a Wonky Stitched Rectangle die and placed it on a Sahara Sand card base from Stampin' Up. I placed the cute images with dimensionals on to my card. Check the photo below to see which Copic colours I used. I'd like to send my card in to the challenge that runs at MFT Card Challenges, the Birthday Project.
Thank you so much for watching today, hope to see you next time! Wishing everyone a Happy Christmas, hope you'll enjoy the Holidays!
Hi everyone, welcome to a new blog post! Hope you are all doing ok! We had a bit of the first snow last week for this winter, so I thought I create a fun winter card today! I created this cutie with the Polar Pals stamp set from MFT. Make sure to scroll to the end of this post to see a Video Tutorial for this card!
I picked the cute seal from the set to be the vocal point for this card. He even has a little sweater and hat on, just the sweetest! I coloured this fun guy with Copic Markers. Check the photo below to see which colours I used.
I started colouring with my darkest marker in the same color scheme on the places where I'd like the most shade to be and then start colouring my way up to the lightest colour. After finishing my colouring with the Copic Markers, I added some dots with a white gel marker. I placed my image with dimensionals on to my finished card at the end to make it stand out a bit more.
I used a base from white cardstock for my card and started building the scenery up. I used a Stitched Rectangle Die from MFT for the background and started blending this piece of cardstock with a blending tool and Squeezed Lemonade and Cracked Pistachio Distress ink from Ranger. I diecutted a piece of cardstock with the Snowfall Vertical Die from MFT to use as a stencil to add the snowflakes with white embossing paste.
I then added the mountains, diecutted with the Snow-capped Mountains Dies and coloured with Copics. I placed them behind the snow front that I diecutted with the Stitched Snoe Drifts Dies from MFT as well. I added white embossed tekst on a piece of white cardstock that I coloured with a red Copic marker. Check the Video Tutorial to see how this all came about below, or watch in HD on YouTube here!
I would love to enter this card at the new sketch challenge over at the MFT Challenge. Thank you so much for watching today, hope to see you next time!