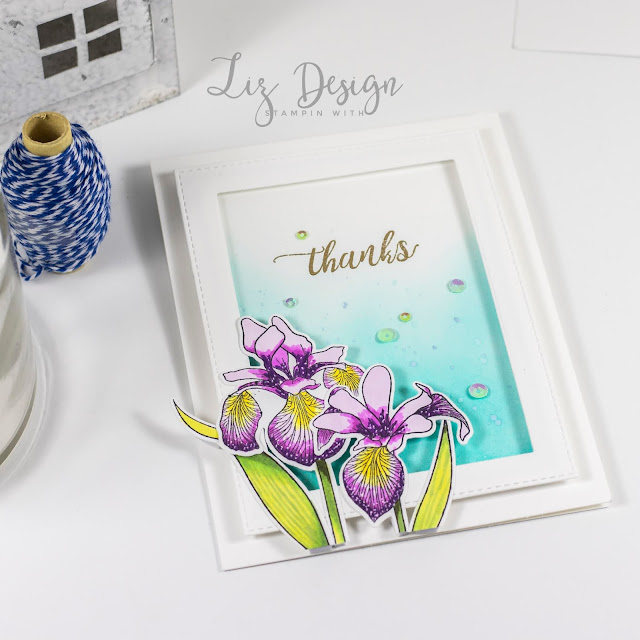
Hi guys, welcome to my blog today! I'm sharing a gorgeous card today created with the Enchanted Iris stamp set from Altenew! I love this flower set, these flowers are so pretty! Wouldn't mind having a few of them in my home! Make sure you watch the Video Tutorial at the end of this post to see how this card is created!
De basis voor deze kaart is een strook Thick Whisper White Cardstock van Stampin' Up. Op de voorgrond heb ik een frame van Whisper White Cardstock geplaatst op dimensionals die ik gestanst heb met 2 Stitched Rectangle Dies van MFT. Op de basis van de kaart heb ik binnen de lijnen van het frame een deel gekleurd met een blending tool en Peacock Feathers Distress inkt van Ranger.
.
The base for this card is from Thick Whisper White Cardstock from Stampin' Up. Up front I placed a frame of Whisper White Cardstock on dimensionals that I diecutted with two Stitched Rectangle Dies from MFT. I coloured a piece of paper on my card that fits right behind the frame with a blending tool and Peacock Feather Distress ink from Ranger.
Daarna heb ik mijn bloemen gestempeld met behulp van een stamping tool en Black Tuxedo Memento inkt op Solar White Neenah cardstock. Dit papier is geweldig om met Copic Markers te kleuren. Ik heb de bloemen wel eerst gestanst voor ik met kleuren ben begonnen.
I then stamped my flowers using a stamping tool and Black Tuxedo Memento ink on to Solar White Neenah Cardstock. This paper is great to color with Copic Markers. I diecutted these images with the coordinating dies before colouring.
Ik heb de bloem Iris wel even moeten googlen om te zien welke kleuren deze heeft. Ik ben wel helemaal verliefd op de paarse versie, zo mooi! Ik ben begonnen met de groene tinten op de blaadjes. Daarna heb ik de bloemen in verschillende tinten paars gekleurd met geel in het midden. Op onderstaande foto kun je zien welke kleuren Copic Markers ik heb gebruikt voor deze kaart.
I actually googled the Iris flower to see which colours it usually has. I think this purple version is just amazing! I started with the greens for the leaves and went from light up to darker colours. I coloured my flowers in different shades of purple and kept some yellow in the middle. In my photo below you can see which colours Copic Markers I used to create this card with.
Ook voor deze kaart heb ik weer mijn best gedaan om een Video Tutorial te maken. Het wordt alleen steeds donkerder in huis met deze dagen, dus de kleuren met name op het inkleur gedeelte hadden scherper gekund. Toch hoop ik dat het een goed beeld geeft hoe deze kaart tot stand is gekomen, veel kijkplezier! Om de video in HD te kunnen bekijken op YouTube, klik hier!
I tried my best to create a Video Tutorial for this card as well. But with winter arriving it gets darker inside our house as well, so I was hoping the Video would be a bit better quality than it is, I hope everything is still sharp enough for you to get a good idea about how this card was created, have fun watching! If you'd like to see this video in HD on YouTube, click here!
Ik zend deze kaart graag in naar de nieuwe challenge die gisteren van start is gegaan bij Freshly Made Sketches! Altijd leuk om mee te doen met een leuke sketch! Bedankt voor het kijken, tot de volgende keer!
I'd like to send this card in to the challenge that started yesterday at Freshly Made Sketches! Always fun to enter a challenge with a nice sketch! Thanks for watching, hope to see you next time!


